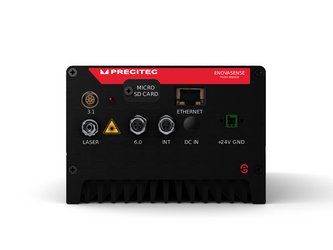
Highly versatile thickness measurement of almost all coatings
How laser photothermal technology works
A laser source illuminates the surface of the coated object. Part of this laser light is absorbed by the coating material and transformed into a non-destructive heat wave that starts to diffuse into the coating material depth-wise. When it arrives at the interface with the substrate, the contrast between the thermal properties of the two materials and the interface gap between them generate a backward diffusion of the heat wave. On return to the coating surface, this heat wave emits a thermal infrared flux into the air. An optical system then collects this thermal flux and focuses it on an infrared sensor. By comparing this thermal signal with the laser signal transmitted to start with, it is possible to determine the delay between the two signals, which is directly proportionate to the coating thickness.
Advantages of laser photothermal technology
As almost all opaque materials can be heated this way, this measurement technology works on almost all coatings and substrate materials – and on far more materials than any other existing non-contact, non-destructive technology.
Advantages of Enovasense sensors
- Large range of measurable thicknesses in the nanometer to millimeter range
- Repeatability and accuracy of between 0.5 and 3% of the measured thickness
- Measurement stays stable in the submicrometric range for years
- Ultra-compact and light in weight
- High distance tolerance from ±1mm to ±10mm
- High angle tolerance from ±10° to ±50°
- High tolerance to vibrations
- Independent of part curvature, shapes, and edges
For more information on how you can benefit from our photothermal sensors view our product detail pages.
Enovasense Product Portfolio
Enovasense Point Sensor
- Next-generation laser photothermal probe
- Light in weight and easy to integrate
- Works on all types of coatings
- High precision and repeatability
- Suitable for inline or at-line integration
- Highly versatile


![[Translate to Englisch:] [Translate to Englisch:]](/fileadmin/Home/3d-messtechnik/technology/B_Interferometric_Pointsensor_768_Linking_01.jpg)
![[Translate to Englisch:] [Translate to Englisch:]](/fileadmin/Home/3d-messtechnik/technology/Chromatic_Confocal_Principle_Precitec-Optronik_Linking.jpg)